
Crochet for Beginners: Ombre Kitchen Kit

I enjoy teaching brand new beginners how to crochet.  It is so much fun to introduce someone to the craft!  I designed the Ombre Kitchen Kit as a series of skill building patterns to teach basic stitches like the chain stitch, single crochet, slip stitch, half double crochet, and double crochet, and fundamental techniques like working in rows, joining two pieces of crochet, changing colors, working in rounds, and working in a spiral.


You Will Need:

  • Pattern for Ombre Kitchen Kit 
  • Crochet Hook H-8/5.0mm
  • Basic Yarn Craft Kit:  Small Scissors, Soft Tape Measure or Ruler, Yarn Needle, Removable Stitch Markers.  (You probably have perfectly good substitutes lying around, like kids safety scissors, 12" ruler, a large eyed needle, and safety pins.)
  • 4 skeins Worsted (4) Weight Yarn.  [Since this is a kitchen project, be sure to use 100% cotton yarn.]  200g/280yds Yarn A (Solid) and 200g/280yds Yarn B (Multicolored)
Project #1:  Double Thick Potholder
 
Project #2:  Skill Building Dishcloths
     
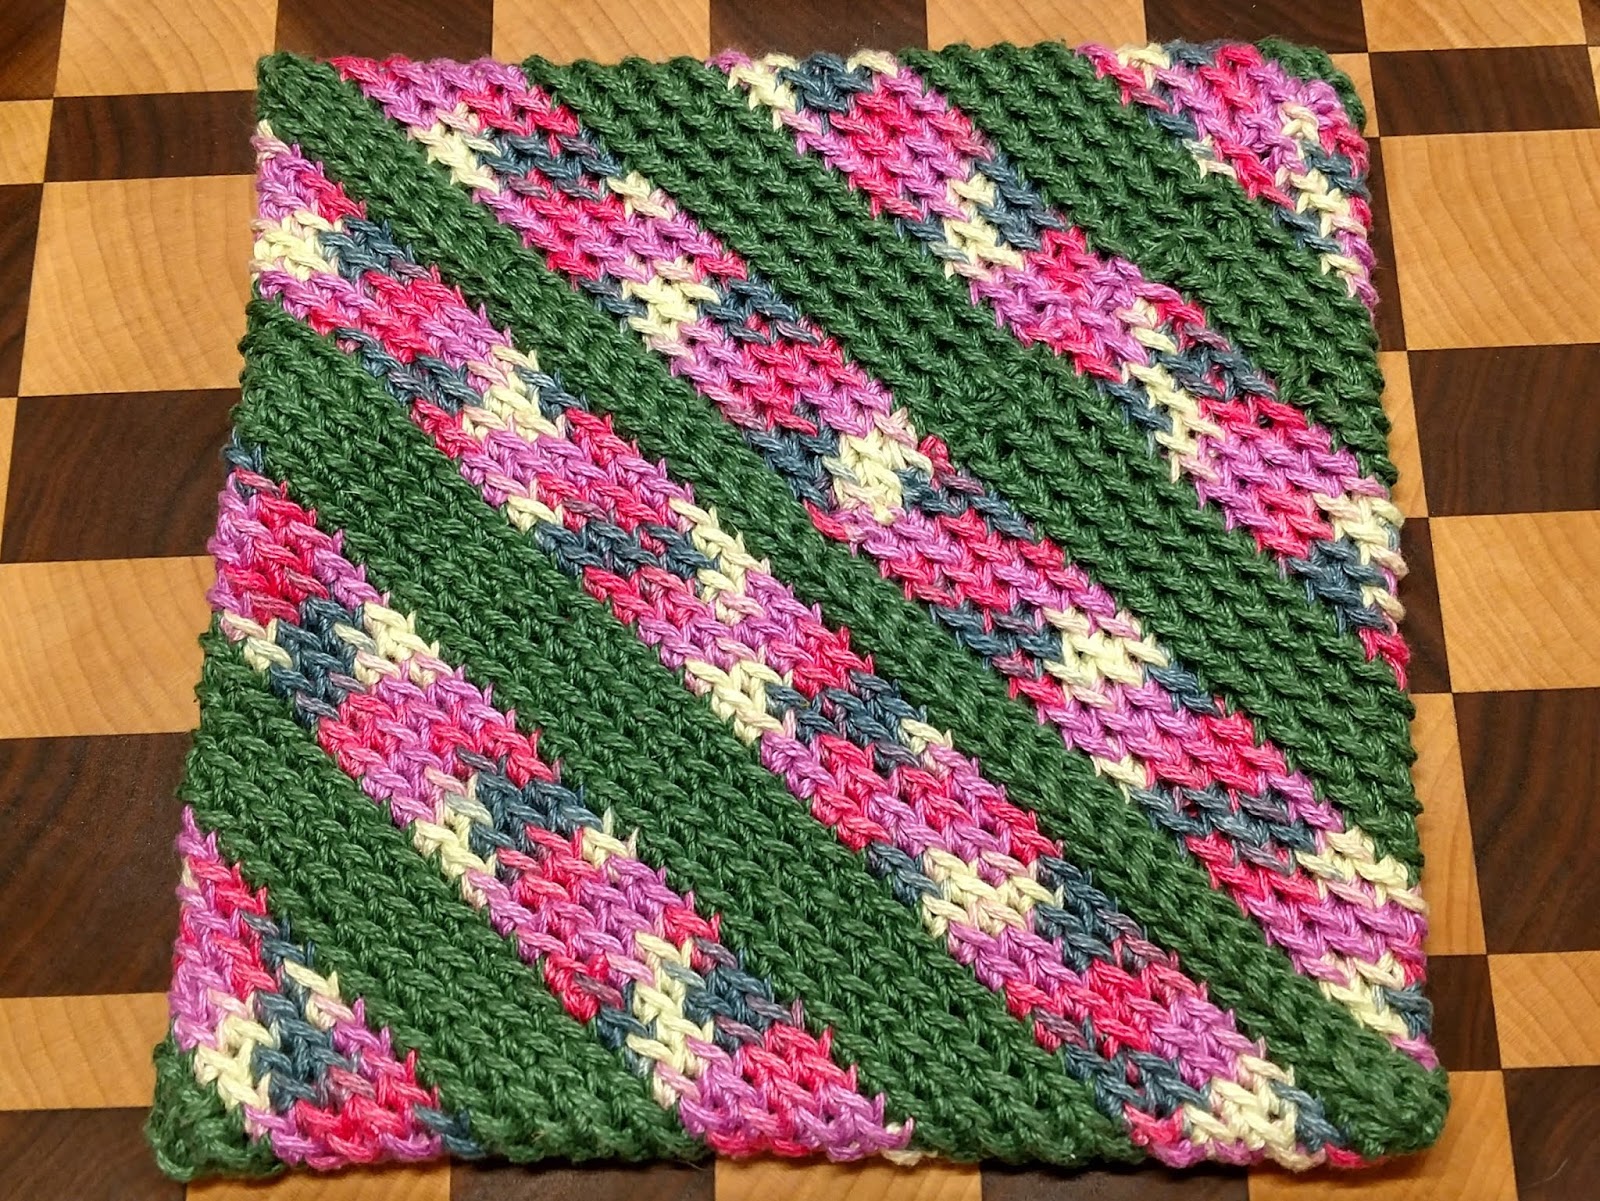
Project #3:  Diagonal Ombre Trivet

Project #4:  Round Ombre Trivet
Remember to grab the pattern for Ombre Kitchen Kit from Ravelry!  

This is not a free pattern.  I put a lot of work into designing, beta-testing, and technical editing for this collection, which includes five patterns and very detailed instructions for basic stitches and fundamental techniques.  Since I do not use affiliate marketing or intrusive advertising, pattern sales are the main source of income for this blog.  Your support will help keep Vintage Vixen Press up and running!

Comments

Popular posts from this blog

Amigurumi Alice in Wonderland

Crochet Now has a great amigurumi crochet-a-long to make an Alice in Wonderland Tea Cozy! With 19 different colors of Sirdar's  Hayfield Bonus DK , the project is bright and colorful. Those jelly rolls look good enough to eat! Isn't Alice adorable?  I love her curly ringlets.  And check out that little teapot! The pattern is available for free her:   Wonderland Tea Cosy CAL . Note: The patterns are in UK Terms.  Check out my US-UK Conversion Chart !

The Danica Quilt

This is a very simple quilt that I created for a very special niece.  These juvenile prints prints in bright colors made the quilt very fun to piece!  The pattern is a basic square-in-square, great for precuts.  I used 60 charm squares and 40 jelly roll strips, but a variety of fat quarters would do the trick! "The Danica" Block Size:  8" x 8" Layout:  6 columns of 10 blocks each, with 4" borders. Quilt Dimensions:  56" x  88" (extra-long twin) Materials:   Blocks:  2/3 yd each of 10 fabrics  (or 40 jelly roll strips & 60 charm squares) Border: 7/8 yd, cut into 4 1/2" strips Binding:  1/2 yd, cut into 2" strips, joined diagonally. Batting:  Twin (at least 60" x 90") Backing:  2 1/2 yds Minky (60" width of fabric) Directions: Cut each of the 10 fabrics as follows: Step One:  4 strips 2 1/2" x 42" (Width of Fabric), subcut into (12) 4 1/2" and (12) 8 1/2" rectangles. Step Two:  2

Organizing Your Fabric Stash: Step 5

This is the fifth and final installment in a series on Organizing your Fabric Stash.  While some of these tips apply to other crafts, I'm focusing here on fabric.  Check back later for tips on organizing your Notions! Before reading, be sure to check out  Step 1: Let It Go ,  Step 2:  Gathering Projects Together ,  Step 3:  Organizing Your Fabric By Size , and  Step 4:  Organizing Your Fabric By Material . Step 5:  Organizing Fabric by Color One of the keys to great quilt design is the creative use of color.  Organizing your fabrics according to the color wheel will help you see new and interesting possibilities! Florals, Plaids, Polkadots, & Animal Prints:  These distinctive patterns can be held back or mixed into the colorwheel depending on their main color.   I usually hold “loud” fabrics with big designs back in their own section. Batiks:  Batik fabrics have such a distinctive look!  I usually keep them in their own section, still organized by the color wheel Warm